The macOS app’s first-run flow: pick where the Gateway runs, install any
missing local runtime, and connect a verified AI backend. The app then opens
guided onboarding in the dashboard for optional setup and the handoff to your
agent.
For CLI onboarding and a comparison of both paths, see Onboarding Overview.
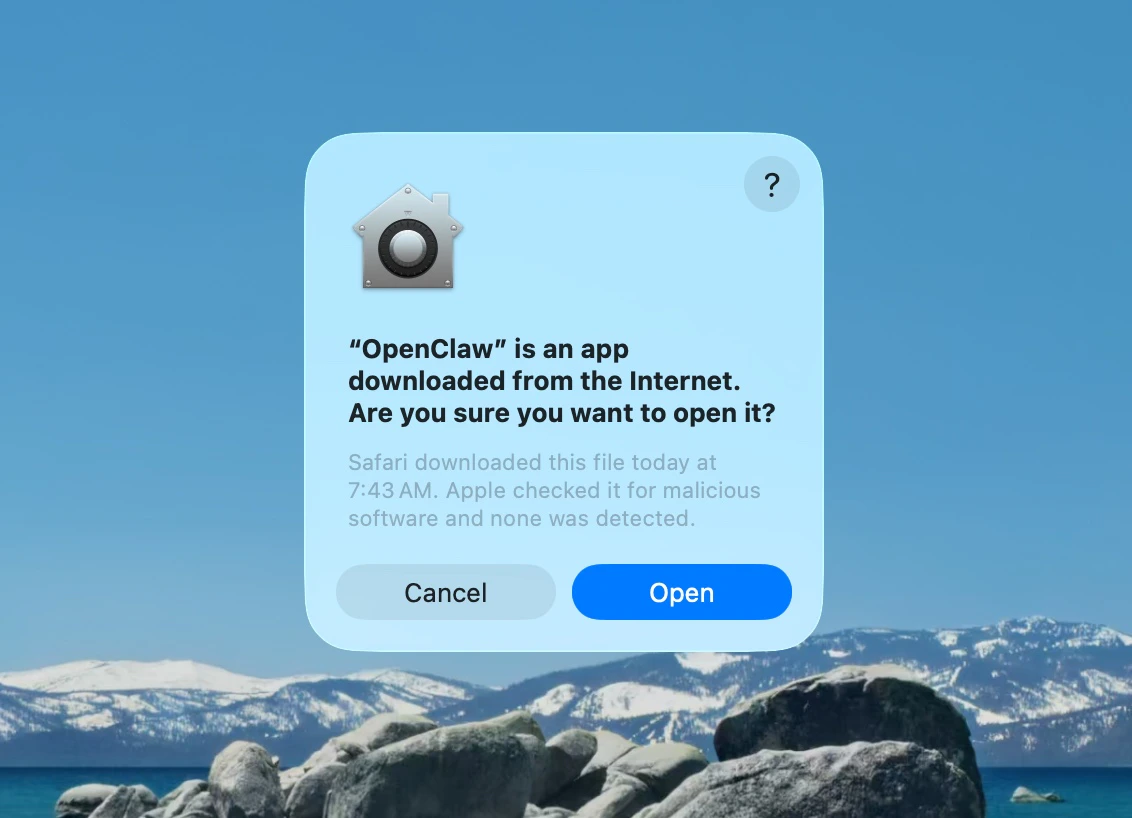
The first time you open OpenClaw.app, macOS asks you to approve a downloaded
app. Click Open to continue.
2
Approve find local networks
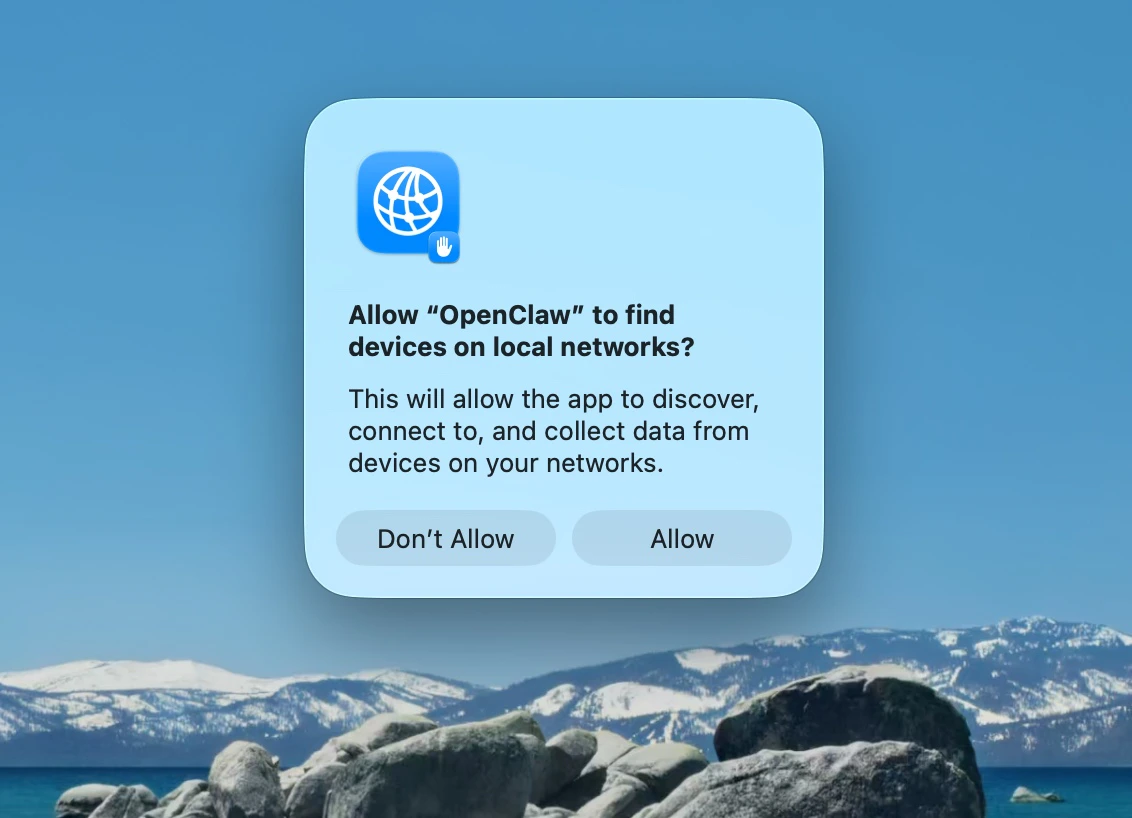
macOS then asks whether OpenClaw may find devices on your local network.
Click Allow. The app uses this to reach a Gateway on another machine.
3
Welcome and security notice
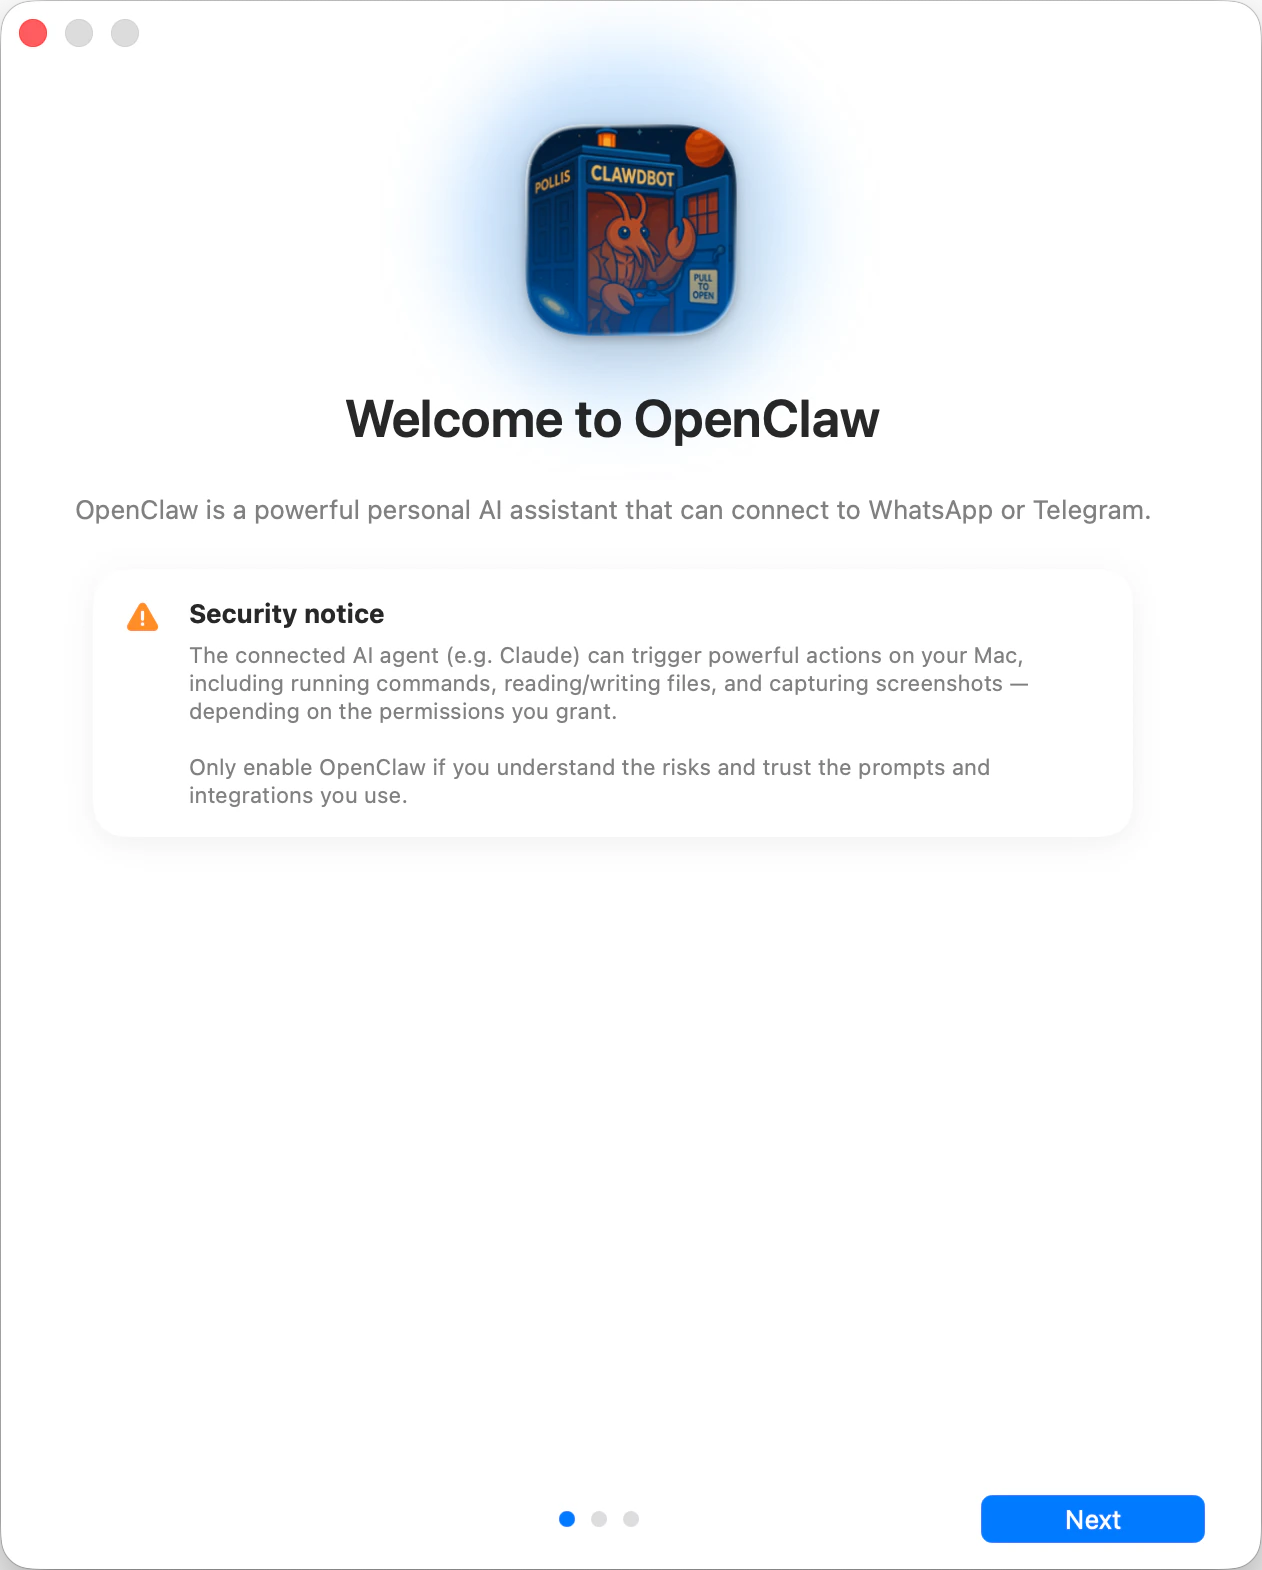
The app opens on its welcome screen with the security notice. Read the notice,
then continue when you accept the trust model below.
Read the security notice displayed and decide accordingly
Security trust model:
By default, OpenClaw is a personal agent: one trusted operator boundary.
Shared/multi-user setups need lock-down: split trust boundaries, keep tool access minimal, and follow Security.
Local onboarding selects tools.profile: "full" when no profile is configured and preserves explicit profiles and other tool policies. Full tool selection does not grant execution permissions. See Tool profiles.
If hooks/webhooks or other untrusted content feeds are enabled, use a strong modern model tier and keep strict tool policy/sandboxing.
4
Local vs Remote
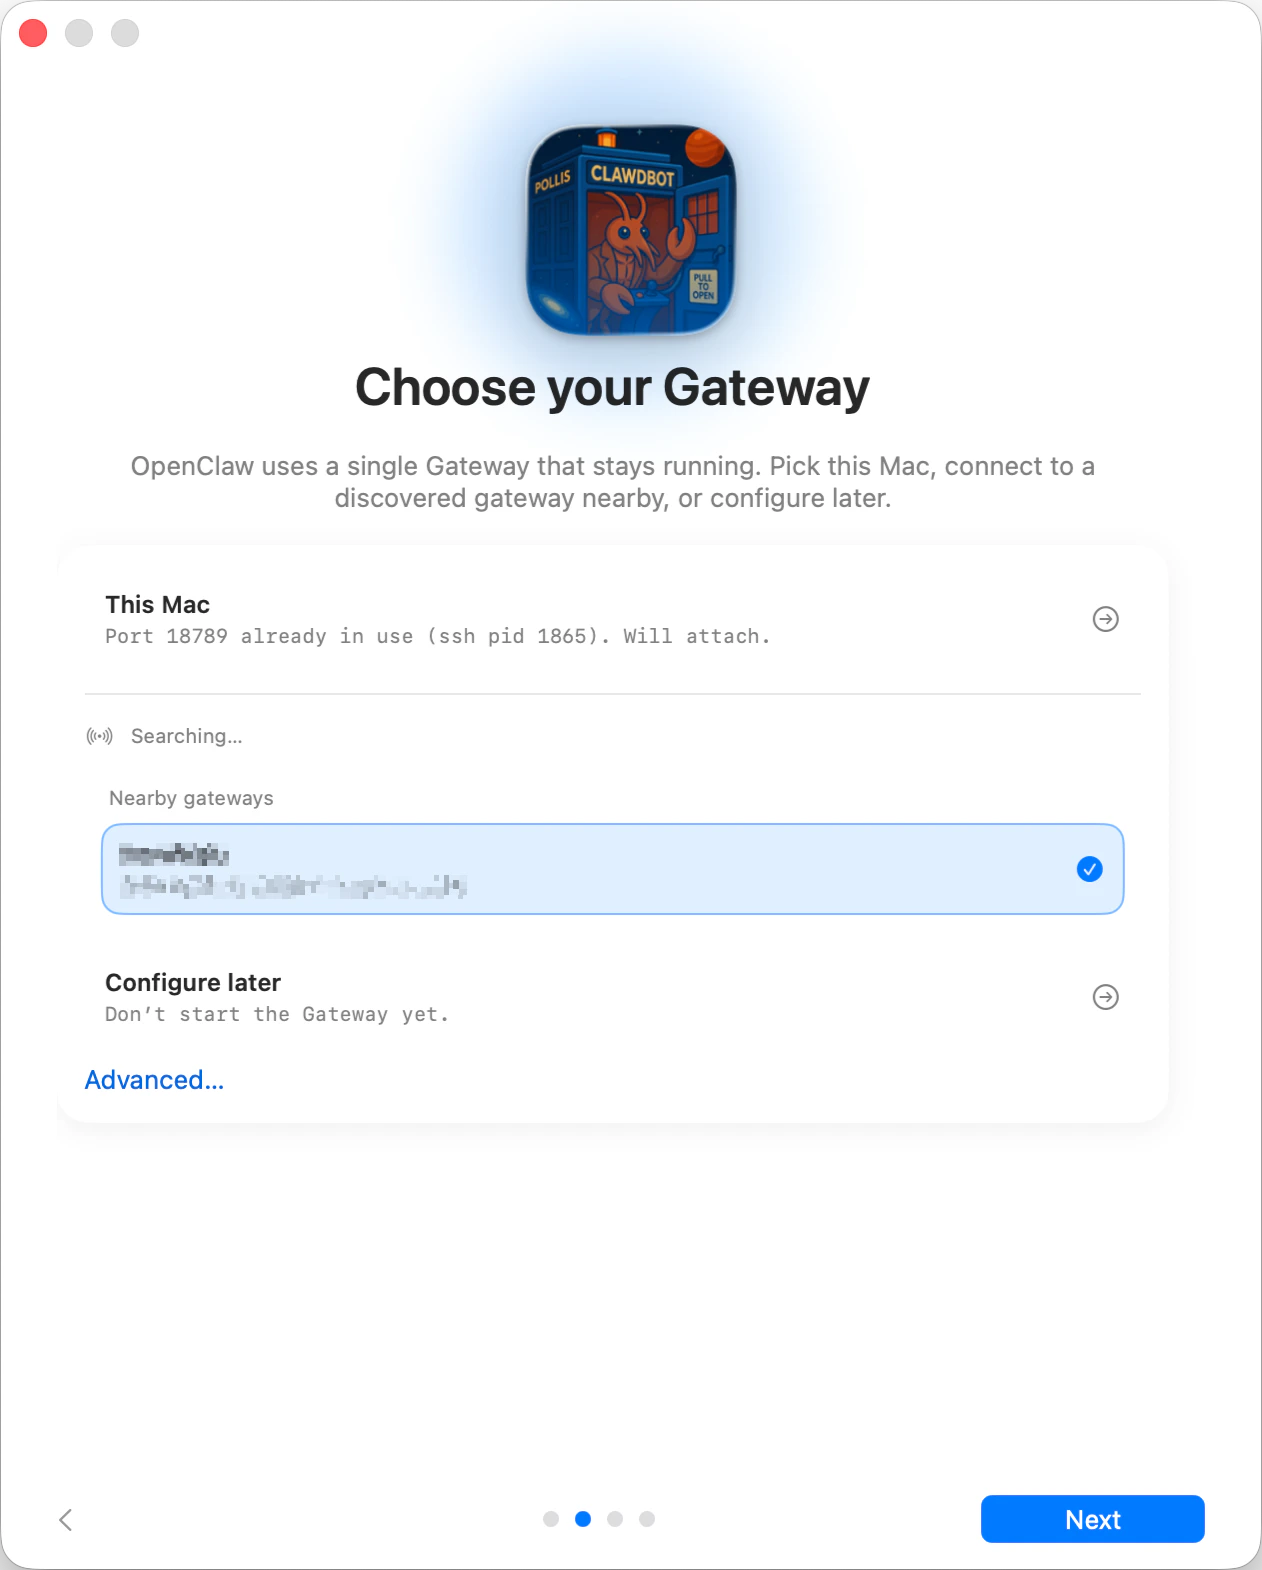
Where does the Gateway run?
This Mac (Local only): onboarding configures auth and writes credentials locally.
Remote (over SSH/Tailnet): onboarding does not configure local auth;
credentials must already exist on the gateway host. The remote gateway token
field stores the token the macOS app uses to connect to that Gateway;
existing gateway.remote.token SecretRef values are preserved until you
replace them.
Configure later: skip setup and leave the app unconfigured.
Gateway auth tip:
Gateway auth mode defaults to token even for loopback binds, so local WS clients must authenticate.
Setting gateway.auth.mode: "none" lets any local process connect; use that only on fully trusted machines.
Use a token for multi-machine access or non-loopback binds.
5
CLI
Local setup reuses a compatible CLI installation or uses the bundled installer
to install openclaw and Node in a private managed runtime. It does not require
a global npm, pnpm, or bun install.Attaching to an independently managed local Gateway skips CLI installation
and proceeds to AI checks without taking over its CLI or service installation.
See Gateway on macOS.
6
Connect your AI
If the connected Gateway already has a configured agent model, it appears as
Current model. Select it to verify that exact route with a real completion
and open the normal dashboard. Opening onboarding does not test an existing
route or choose a different provider.Once the Gateway is ready, onboarding looks for AI access you already have:
a Claude Code or Codex login, OPENAI_API_KEY / ANTHROPIC_API_KEY, or a
tool-capable model with at least 16K of measured effective context already
loaded in a reachable LM Studio or Ollama server. Detection runs on the
Gateway host, including when the macOS app connects to a Linux Gateway. Detection
only presents choices: it does not test, activate, install, or save any candidate.
Select the connection you want before OpenClaw saves any returned credential and runs one
confirmation turn without tools. It activates the connection only after success.
In particular, an existing Codex subscription is never selected automatically.
If setup fails, the app keeps the detailed reason visible so you can retry or
choose another connection. Local discovery never pulls or downloads a model.
Ollama checks /api/ps for loaded models; an eligible
model that is only installed on disk requires explicit setup through
Choose connection → Local only. See Ollama.The provider picker is built from installed manifests and OpenClaw’s official
provider-plugin catalog, so installable providers such as Meta appear before their
plugin is present. When a connection needs a runtime plugin, the app and dashboard show the
staged package’s source and capabilities, with integrity when available before installing or
enabling it, including verified first-party packages. Review the details, then
explicitly confirm acceptance to continue.
Declining or confirmed cancellation stops that attempt without selecting another
inference route. If the confirmation turn fails, the app shows the failure and
keeps the saved credential. Choose the saved sign-in in Model Setup to retry
without signing in again. Runtime plugins installed for that attempt are kept.Fresh installs also ask whether existing native provider conversations should
appear in the sidebar. This is discovery in place, not transcript copying, and is
off until selected. Turning it off persists sessionCatalog.enabled=false for
the available native catalog plugins; existing upgraded installations keep their
current behavior.For a custom OpenAI- or Anthropic-compatible endpoint on a local Gateway, choose
Custom OpenAI/Anthropic-compatible endpoint and complete the Gateway-owned
wizard. When the Gateway is remote, the Mac does not collect that host’s secret;
run openclaw onboard --auth-choice custom-api-key on the Gateway host, then
return to the app and refresh detection.If the result is uncertain or settings may already have been saved, the app keeps
replacement setup blocked while it checks the Gateway. Check again repeats
that check without starting another activation; it does not discard the pending
attempt or shorten its wait. If reconciliation still cannot confirm completion
after the wait, the app returns to connection choices with the error visible
instead of automatically retrying a detected credential. Retry that connection
or choose another one to start a new activation.The macOS setup sheet shows the selected provider and current activity with a
spinner while the Gateway works. Plugin installation does not estimate a
completion percentage. Review prompts and input controls appear when an answer
is needed; installation and the final live AI test stay in the same flow.After you choose Cancel, wait for confirmation. The Gateway may need to
finish an operation that has already reached its commit point. If cancellation
cannot be confirmed, the sheet says setup may still be running and lets you
retry Cancel.To use a Claude subscription when the Gateway host has no Claude CLI login, run
claude setup-token on any machine with Claude Code installed, then paste the
printed token as Anthropic setup-token under Connect with an API key or
token.Pi and OpenCode installs may be shown for context when they cannot be selected
as the reusable guided-setup inference route. They are whole-agent harnesses,
not setup inference routes; their session integrations require separate runtime
and plugin setup. Gemini CLI and Antigravity are not offered as detected setup
routes.You can also sign in through the provider’s own OAuth or device-pairing flow.
The built-in choices include OpenAI/ChatGPT, OpenRouter, GitHub Copilot, xAI,
MiniMax Global and CN, and Chutes. Google is available through the supported AI
Studio API-key route. The list comes from the
Gateway’s active text-inference provider plugins rather than a fixed app list,
so another provider can opt in without adding provider-specific macOS code.The manual key/token picker uses the same provider registry. In every route,
the provider supplies its starter model and configuration. If the starter is an
alias, OpenClaw tests and saves the provider’s canonical model name while
preserving existing model settings that the starter does not replace.
A replacement credential stays inactive until you accept Activate this saved
sign-in? after verification. Declining keeps your current connection and the
saved replacement. Setup preserves unrelated configuration edits made during
verification. If the same connection settings change, review them and retry the
saved sign-in instead of overwriting the newer settings.
Continuing remains locked until one backend has passed, so the first agent
chat cannot start without working inference.
7
Continue in the dashboard
After a new model passes its live check, native setup closes and opens guided
onboarding in the dashboard. OpenClaw helps configure the remaining workspace,
Gateway, channels, and other optional features, then hands you off to normal
agent chat. A verified pre-existing model opens the normal dashboard instead.Memory import is part of guided setup, not a separate native onboarding page.
For a local Gateway, supported sources include Claude Code auto-memory, Codex
consolidated memories, and Hermes memory files. Selected memories are copied
into the agent workspace under memory/imports/ for indexed recall;
already-imported files are skipped. Import is optional and remains available
later under Settings → Import Memory, with per-file control.There is no separate native permissions walkthrough before this handoff. Grant
macOS access for the features you want to use from Settings → Permissions.
Available permissions include Automation (AppleScript), Notifications,
Accessibility, Screen Recording, Microphone, Speech Recognition, Camera, and
Location. See macOS permissions for grant and
recovery guidance.See Bootstrapping for what happens on the Gateway host
during the agent’s first real turn. OpenClaw remains available later under
Settings → OpenClaw.